Step by Step Guide to Changing a Ceiling Light Pendant in the UK

Changing a ceiling light pendant looks simple until you lower the ceiling rose and find several brown, blue, red or black wires tucked inside. The job is often straightforward, but it must be done carefully. Lighting circuits can contain permanent live conductors even when the wall switch is off, so the safest approach is to isolate the circuit, test properly, and copy the existing wiring layout rather than guessing.
This guide explains how to replace a standard UK ceiling pendant light fitting with a new pendant set. It covers the tools, safety checks, common wire colours, and the step-by-step process from switching off the power to testing the new light.

Before you start, know when to stop
In the UK, replacing a like-for-like ceiling pendant is usually treated as minor electrical work. That does not mean it is risk-free. Electrical work must still be done safely and competently.
Call a qualified electrician if:
You cannot identify the wires with confidence.
The wiring looks damaged, brittle, burnt, or loose.
There is no earth wire where the new fitting needs one.
You find old rubber or fabric-insulated cable.
The light is in a bathroom or another special location.
The wiring does not match the usual pendant layout.
The circuit keeps tripping after replacement.
Never rely on the wall light switch alone. Switch the lighting circuit off at the consumer unit and prove the circuit is dead before touching any conductors.
If the new pendant is plastic and similar to the old one, the job is usually simpler. If you are swapping to a metal light fitting, the earth connection becomes especially important. A metal fitting must be earthed unless it is clearly marked as Class II double insulated, usually shown by a square within a square symbol.
Tools and materials you will need
Gather everything before you isolate the power. You do not want to be searching for a screwdriver in poor light.
Useful tools and materials include:
New ceiling pendant set, including ceiling rose, flex, and lamp holder
Insulated screwdrivers
Voltage tester, ideally a two-pole voltage tester
Proving unit, or a known live source to check the tester before and after use
Small step ladder
Phone or camera for reference photos
Masking tape and pen for labelling wires
Wire strippers, if needed
Small torch or work light
Suitable lamp bulb with the correct cap and wattage for the fitting
Avoid using a neon screwdriver as your only test device. It can give misleading results. A proper voltage tester is a much safer choice.

Understand the wires in a UK ceiling pendant
Before you remove anything, it helps to understand what you are looking at.
Many UK ceiling pendants use a loop-in ceiling rose. That means the ceiling rose is not only holding the pendant flex. It is also acting as a junction point for the lighting circuit.
Inside a typical ceiling rose, you may see three groups of terminals:
Terminal area | What it usually contains | What it does |
Loop or live loop | Permanent live conductors | Carries power through the lighting circuit |
Neutral | Blue or old black neutral conductors | Completes the circuit for the lamp |
Live or switched live | Brown, old red, or sleeved conductor from switch | Sends power to the lamp when the switch is on |
Earth | Green and yellow sleeved conductors | Provides protective earthing |
Modern UK wiring colours are usually:
Brown Live
Blue Neutral
Green and yellow Earth
Older wiring may use:
Red Live
Black Neutral
Green and yellow, or bare copper with sleeving Earth
One thing often catches people out. A black or blue wire connected to the live terminal may actually be the switched live from the wall switch. It should be marked with brown or red sleeving, but older installations are not always labelled correctly.
Do not assume wire function by colour alone. Look at where each wire is connected before you disturb it.
Step by step instructions for changing a ceiling light pendant
Follow the steps in order. Do not rush, and take clear photos before disconnecting any wires.
1. Switch off the lighting circuit
Go to the consumer unit and turn off the correct lighting circuit. If the circuits are not clearly labelled, switch off the main power.
Then try the light switch. The light should not come on. This is only a first check, not proof that the circuit is safe.
If the light you are replacing is already not working, test another light on the same circuit if you can. This helps confirm that the correct circuit has been isolated.
2. Prove your voltage tester
Before testing the ceiling wires, check that your voltage tester works.
Use a proving unit if you have one. If not, test it on a known live source, such as a socket circuit that is still energised. Only do this if you know how to use the tester safely.
This matters because a faulty tester can make a live circuit appear dead.
3. Remove the bulb and shade
Take out the bulb and remove the lampshade. Put them somewhere safe.
If the bulb was recently on, let it cool before handling it. Some bulbs, especially older types, can get very hot.
4. Unscrew the ceiling rose cover
Most pendant ceiling rose covers unscrew by hand. Hold the pendant flex gently and rotate the cover anticlockwise.
Let the cover slide down the flex. You should now see the base of the rose fixed to the ceiling, with several terminals inside.
Do not touch the exposed conductors yet.
5. Test that the circuit is dead
Use your voltage tester on the terminals inside the ceiling rose. Test between:
Live and neutral
Live and earth
Neutral and earth
If your tester shows voltage, stop. The circuit is still live or there is another issue. Go back to the consumer unit and isolate the correct circuit, or call an electrician.
After testing the ceiling rose, prove your tester again on the proving unit or known live source. This confirms the tester was working before and after the safety check.

6. Photograph and label the existing wiring
Take a clear photo of the wiring before you loosen any screws. Take more than one photo if needed.
Make sure your photo shows:
Which wires go into the loop terminals
Which wires go into the neutral terminals
Which wire goes to the switched live terminal
Where the earth wires are connected
Where the pendant flex brown and blue wires are connected
If there are several similar cables, label them with masking tape. This is especially useful in older homes, where wire colours may not be consistent.
7. Loosen the pendant flex terminals
If you are replacing the full pendant set, you will usually remove the old pendant flex from the ceiling rose first.
The pendant flex normally has two small conductors:
Brown flex conductor to switched live
Blue flex conductor to neutral
Loosen the terminal screws and pull out only the pendant flex wires. Leave the fixed ceiling wires in place if you are only changing the pendant drop and lamp holder.
If you are replacing the whole ceiling rose, you will need to disconnect all conductors, but only after you have photographed and labelled everything carefully.
8. Remove the old ceiling rose base
If the new pendant includes a new rose, unscrew the old base from the ceiling.
Support it as you remove the screws so it does not pull on the fixed wiring. Once free, gently move it away from the ceiling cables.
Check the condition of the wiring. The copper should not be badly tarnished, damaged, or brittle. The insulation should not crack when moved gently. If anything looks unsafe, stop and arrange for an electrician to inspect it.
9. Prepare the new ceiling rose
Remove the cover from the new ceiling rose and look at the terminals. Most replacement pendant sets have clearly marked terminal blocks.
You will usually see positions for:
Loop
Neutral
Live or line
Earth
Not all fittings are identical, so read the manufacturer’s instructions. If the terminal layout differs from the old fitting, do not connect wires by position alone. Connect them by function.
If the new pendant flex is supplied loose, fit it according to the instructions. Make sure the cord grip holds the outer sheath of the flex, not the individual inner wires.
10. Fix the new rose base to the ceiling
Feed the ceiling wires through the centre opening in the new rose base.
Position the base over the existing fixing holes if possible. If you need new holes, check carefully for hidden cables before drilling. Lighting cables often run through ceiling voids and may pass close to the fitting.
Screw the base firmly to the ceiling, but do not overtighten. A cracked rose base will not hold the fitting properly.
11. Reconnect the wires
Reconnect the conductors according to your photos and labels.
A common loop-in pendant layout is:
Permanent live conductors go into the loop terminal.
Neutral conductors go into the neutral terminal.
The switched live conductor goes into the live terminal with the brown pendant flex wire.
The blue pendant flex wire goes into the neutral terminal.
Earth conductors go into the earth terminal.
The permanent live loop wires do not connect directly to the pendant lamp holder. They sit together in the loop terminal.
Make sure each terminal screw clamps the copper conductor, not the insulation. No bare copper should be exposed outside the terminal, apart from earth conductors inside sleeving where appropriate.
Give each wire a gentle tug after tightening. It should stay firmly in place.
12. Check the earth connection
All earth wires should be sleeved green and yellow and connected together in the earth terminal.
If your new fitting is plastic, it may still have an earth terminal in the rose for continuity. Connect the circuit earths there.
If your new fitting is metal, it must be connected to earth unless the manufacturer states it is double insulated. If there is no earth present in the lighting circuit, do not fit a metal light fitting. Use a suitable Class II fitting or get professional advice.
13. Fit the rose cover, bulb, and shade
Tuck the wires neatly into the rose. Do not force them sharply, and do not trap insulation under the cover thread.
Slide the cover up and screw it into place. It should sit flush and secure against the ceiling.
Fit the lampshade and install a suitable bulb. Check the fitting label for the maximum wattage. With LED bulbs this is rarely a problem, but it is still best to follow the rating.
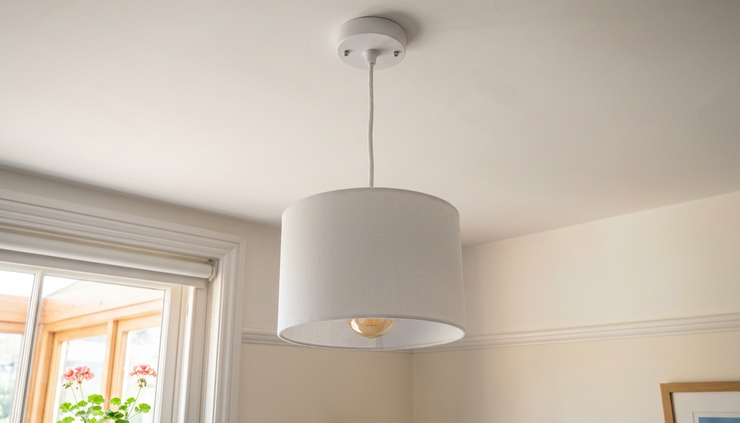
14. Restore power and test the light
Return to the consumer unit and switch the lighting circuit back on.
Operate the wall switch. The pendant should turn on and off normally.
If the breaker trips, the light flickers, or something smells hot or unusual, switch the circuit off immediately. Do not keep trying it. Recheck the wiring only if you can do so safely and confidently. Otherwise, call an electrician.
Common mistakes to avoid
A pendant replacement often goes wrong because someone assumes the job is just matching colours. That can be risky in UK lighting circuits, especially older ones.
Avoid these mistakes:
Mixing all brown or red wires together with the pendant live
Some live conductors are permanent lives for the loop. They should usually stay in the loop terminal, not connect directly to the lamp.
Treating every blue or black wire as neutral
A blue or black switch wire may be a switched live. It should be identified with sleeving, but this is not always present.
Forgetting to connect earth continuity
Even if the pendant is plastic, the earths in the circuit should normally remain connected together.
Leaving bare copper exposed
Exposed live or neutral copper can cause shock risk, short circuits, or tripping.
Overfilling a small terminal
If the new rose has poor-quality or cramped terminals, use a suitable fitting with enough space rather than forcing wires in.
Working in the dark without proper lighting
Use a battery work light if needed. Mistakes are more likely when you cannot see the terminal markings clearly.
What if your ceiling rose wiring looks different?
Not every home has the same lighting method. Some fittings have only one cable at the ceiling, because the junction is elsewhere. Others have several cables because the rose is part of the loop-in circuit.
You might see:
One cable with live, neutral, and earth
Two cables, usually feed and switch
Three or more cables, often loop-in, loop-out, and switch drop
Connector blocks or maintenance-free connectors tucked into the ceiling void
Old colours mixed with new colours after partial rewiring
If the wiring does not match what you expected, pause. The safest method is to identify each conductor by testing, not by guessing.
For a simple like-for-like pendant swap, your best guide is the original wiring arrangement. That is why photos and labels matter so much. They preserve the existing connections before anything gets moved.
How to know the job is done properly
A successful ceiling pendant replacement should look and behave uneventfully. That is a good thing.
Check that:
The rose sits flat against the ceiling.
The pendant flex is held securely by the cord grip.
The lamp holder hangs straight.
The switch works normally.
The consumer unit does not trip.
There is no buzzing, flickering, heat, or burning smell.
No conductor is visible outside the rose.
If everything passes those checks, the replacement is likely complete.
Changing a ceiling light pendant in the UK is a manageable DIY task when the wiring is sound, the fitting is like-for-like, and you follow a careful process. The key is not speed. It is safe isolation, proper testing, clear labelling, and putting each conductor back where it belongs. If there is any doubt, stop before reconnecting and bring in a qualified electrician.


